
Potholder looms are simple.
But simple doesn’t mean foolproof.
If your edges pull in, your square warps, or everything loosens the second you take it off the loom – you’re not bad at this. You just need a few solid potholder loom tips.
Here’s how to fix the most common potholder loom problems and get cleaner, sturdier results.
1. Use a Metal Loom
This alone solves a surprising number of issues.
Plastic looms flex. Pegs bend slightly. Tension shifts without you realizing it.
A metal loom is sturdier, holds shape better, and keeps your square consistent. And it’s not even an investment – mine was $7.
Brands like Harrisville Designs make durable metal versions that last for years.
If your potholders look uneven no matter what you do, start here.
2. Maintain Tension When Removing the Potholder
This is where most problems happen.
You carefully weave everything… and then the second you start removing loops, the whole thing loosens.
Fix:
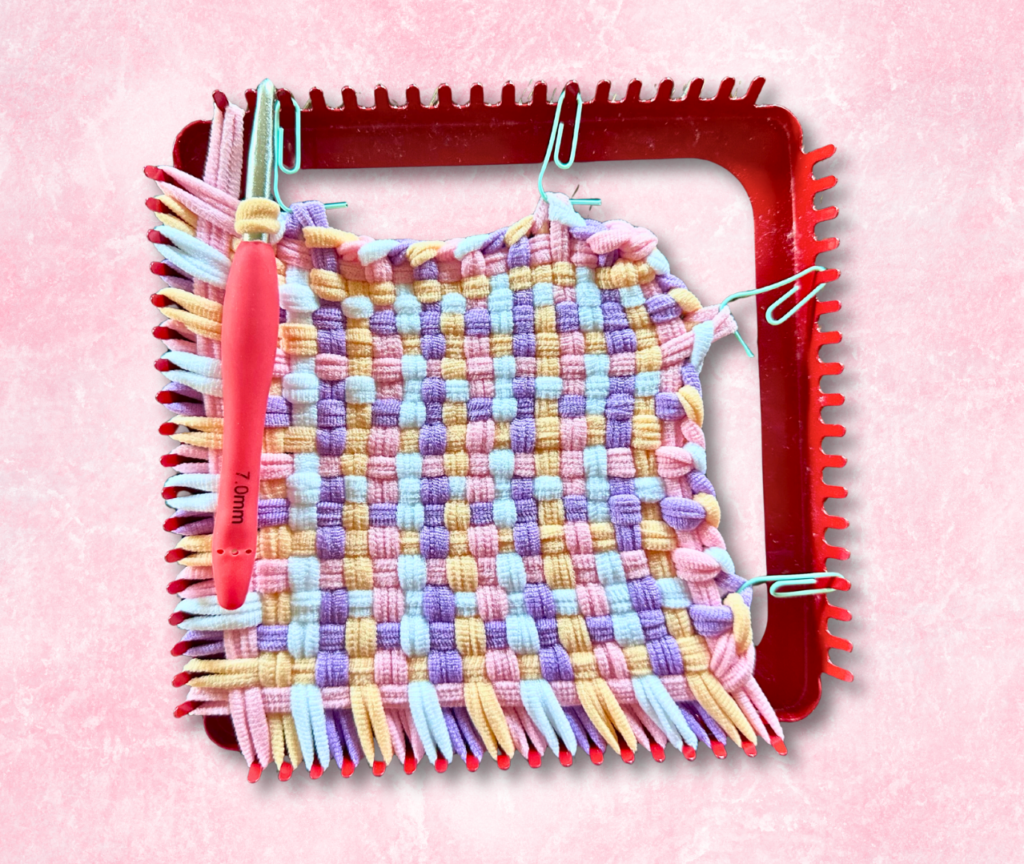
Use paper clips.
As you loop off each edge peg, clip the finished loops together temporarily. This keeps tension consistent and prevents unraveling while you finish the border. See the image at the top of this post for what I mean.
It feels small, but it makes a big difference.
3. Let It Rest Before Removing It
When you finish weaving, resist the urge to immediately pull it off.
Leave the potholder on the loom for a bit.
This allows the loops to settle into position and square up naturally. Think of it like letting fabric relax before handling it.
If your squares tend to bow or skew, this step helps.
4. Use a Crochet Hook to Remove Loops
You do not need to know how to crochet.
A crochet hook simply makes the removal process cleaner and less frustrating than using your fingers.
It:
- Slides under loops easily
- Maintains control
- Reduces accidental stretching
- Speeds up finishing
If removing loops feels fiddly and messy, this one tool changes everything.
5. Don’t Pull Too Tight While Weaving
A common beginner mistake is thinking tighter = better.
It doesn’t.
Overstretching loops causes:
- Edges to pull inward
- Warped squares
- Difficulty during removal
Aim for consistent tension, not maximum tension.
Your loops should sit comfortably on the pegs – not strained.
6. Count Your Pegs Before Removing
Before you begin looping off the edges, do a quick visual check:
- Are all pegs filled correctly?
- Did you miss one?
- Is a loop twisted?
Fixing a mistake before removal is easy. Fixing it after removal is… not.
7. Use Good Lighting
This sounds obvious, but weaving in dim light makes it easy to miss over/under placement.
If your pattern looks off and you’re not sure why, lighting might be the culprit.
Clear visibility = cleaner weaving.
8. If Edges Pull In, Your Tension Is Too Tight
If your finished potholder looks slightly concave on the sides, you’re likely weaving too tightly.
Loosen your hand pressure slightly next time. Let the loom do the structure work.
9. If It Feels Loose After Removal, You May Be Using Stretchier Loops
Polyester loops stretch more than cotton. That can lead to softer, looser results.
If your potholders feel floppy, try cotton loops instead – they hold structure better for functional use.
The Truth About Potholder Loom Mistakes
Most common potholder loom problems come down to:
- Tension
- Removal technique
- Loom stability
The good news? All of these are easy to fix.
You don’t need to “get better” at weaving. You just need a few small adjustments.
And if you’re brand new to potholder looms and want a full overview of setup, tools, and supplies, start with my complete guide to the potholder loom for adults first.